Images in HTML
Extra images are not expected / wanted in profile pages, but are encouraged in personal home pages and research pages. They liven up a page considerably. The recipe is fairly straighforward, especially if one works by modifying existing HTML rather than writing from scratch. Of course, one can do much more sophisticated things than are described below. If you know how to, feel free. But the below should be sufficient for a reasonably smart page.
Choose a suitable image
Make sure the image is suitable. JPEG for photos, PNG for graphs. Resolution (in pixels) no more twice the "CSS" resolution specified for the display. File size generally no more than a couple of hundred KB at most.
The HTML <img> tag
The HTML image tag looks like:
<img src="foo.png" width="200" height="300" alt="A foo" />
The alt text is considered compulsory, and will be used by non-graphical browsers, including screen readers for the blind.
The width and height specify the size in CSS pixels that the image will take up. If given, they allow the page to leave space for the image before the image is downloaded, and the image will be resized to fit. If omitted, the actual size of the image will be used. If you wish images to look perfect on "retina" displays, then you will need to specify width and height, and make them half the real size of the image in pixels.
If the image is more than 320 (CSS) pixels wide, it will not fit on the screen of an iPhone, and Google will start to think that the site is not mobile friendly. This does not necessarily mean that one should not sometimes use images wider than 320 pixels.
Image positioning
The default positioning of images in rarely ideal, especially as the image is treated just like a character -- it does not cause a line-break. There are two simple alternatives.
Centered
The image can be placed in a centered block, perhaps with a short caption.

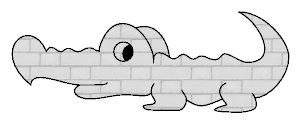
A crocodile
<div style="text-align: center">
<img src="croc.png" width="300" height="121" alt=""/>
<p>A crocodile</p>
</div>
Floating

A crocodile
Here is some long text which will wrap its way neatly around the crocodile and eventually flow happily underneath if the window is made sufficiently narrow.
Eventually one might wish to make sure that full width is regained, and, for that, one needs another div. This paragraph will not be wrapped around the image.
<div style="float: right">
<img src="croc.png" width="300" height="121" alt=""/>
<p style="text-align: center">A crocodile</p>
</div>
<p>Here is some long text which will wrap its way neatly around the
  crocodile and eventually flow happily underneath if the window is
  made sufficiently narrow.</p>
<div style="clear:both;"></div>
<p> Eventually one might wish to make sure that full width is
  regained, and, for that, one needs another div. This paragraph
  will not be wrapped around the image.</p>
If one wishes the image to float to the left, the change is the obvious one.